Social authentication with Django allauth
Social authentication involves creating workflows -- also known as applications -- on third party sites (e.g. Facebook, Google, Twitter) to allow users of such sites the ability to re-use their identity to access external resources -- which in our case will be Django applications. This ability is a very valuable feature in Django applications, because it allows users to register in a few clicks, instead of going through a more involved registration process.
At the most basic level, social authentication processes involve tokens that are authorized by users, which are then exchanged between third party sites and the requesting party (i.e. your Django application) to indicate a user's consent. In addition, depending on the application and its configuration, the requesting party (i.e. the Django application) can solicit basic user information (e.g. email), as well as more elaborate information (e.g. a user's friends in a Facebook application) from the third party site.
Note The following sections assumes you've already set up a base Django allauth configuration, as described in the previous section.
Setup Django allauth for different social providers
There are many social providers
supported by Django allauth and each provider is supported through
its own package that needs to be added to the list of
INSTALLED_APPS in settings.py as
illustrated in listing 10-20.
Listing 10-20 Social provider app installation for Django allauth in settings.py
INSTALLED_APPS = [
    # Django sites framework is required
    'django.contrib.sites',
    'allauth',
    'allauth.account',
    'allauth.socialaccount',
    'allauth.socialaccount.providers.facebook',
    'allauth.socialaccount.providers.google',
    'allauth.socialaccount.providers.twitter',
]
SOCIALACCOUNT_PROVIDERS = {'facebook': {}, 'google':{}, 'twitter':{}}
As you can see in listing 10-20,
the last three apps in the INSTALLED_APPS list
correspond to three social providers: Facebook, Google and Twitter.
Adding these providers to INSTALLED_APPS is the first
step to enable them in social authentication with Django
allauth.
In addition to the
google, facebook and twitter
apps, Django allauth also supports over fifty other social
authentication workflows from various providers[3] under the same
allauth.socialaccount.providers package.
In listing 10-20 you can also see
the SOCIALACCOUNT_PROVIDERS variable with a dictionary
of keys that correspond to each social provider. Each key has an
empty dictionary value that will eventually contain provider
specific configuration options. In the next sections, I'll describe
how to set up each social provider and fill in these configuration
values.
Caution Don't add social provider configurations
to settings.py until you have real connection
parameters to social providers. You'll get errors due to the
missing configuration in the log in page and other workflow
authentication pages.
In addition to the configuration
parameters in SOCIALACCOUNT_PROVIDERS, you'll also
need to add a social provider's application credentials as 'Social
applications' model records through the Django admin. Go to the
Django admin and click on the 'Social applications' model -- shown
if figure 10-13.
Next, you'll be presented with a
screen like the one in figure 10-14 where you can edit and add
social applications, click on the 'Add social application' button
in the top right button. On this page, you'll see a screen like the
one in figure 10-15 where you can select a social provider and
introduce various values associated with a social application (e.g.
name, client id, secret key). For the moment we don't have any of
these values, but keep this Django admin page open, because next
I'll describe where to get the values for each of the three social
providers you added to the INSTALLED_APPS variable in
listing 10-20.
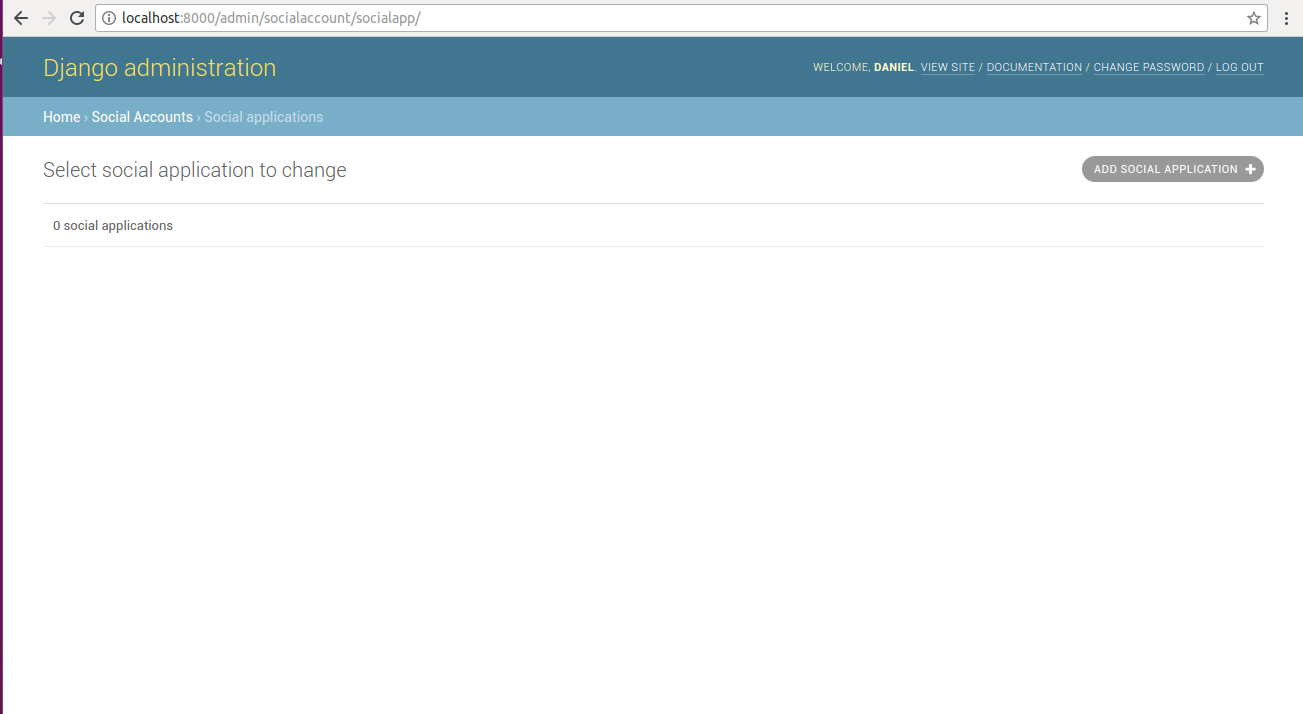
Figure 10-14. Django social application list page
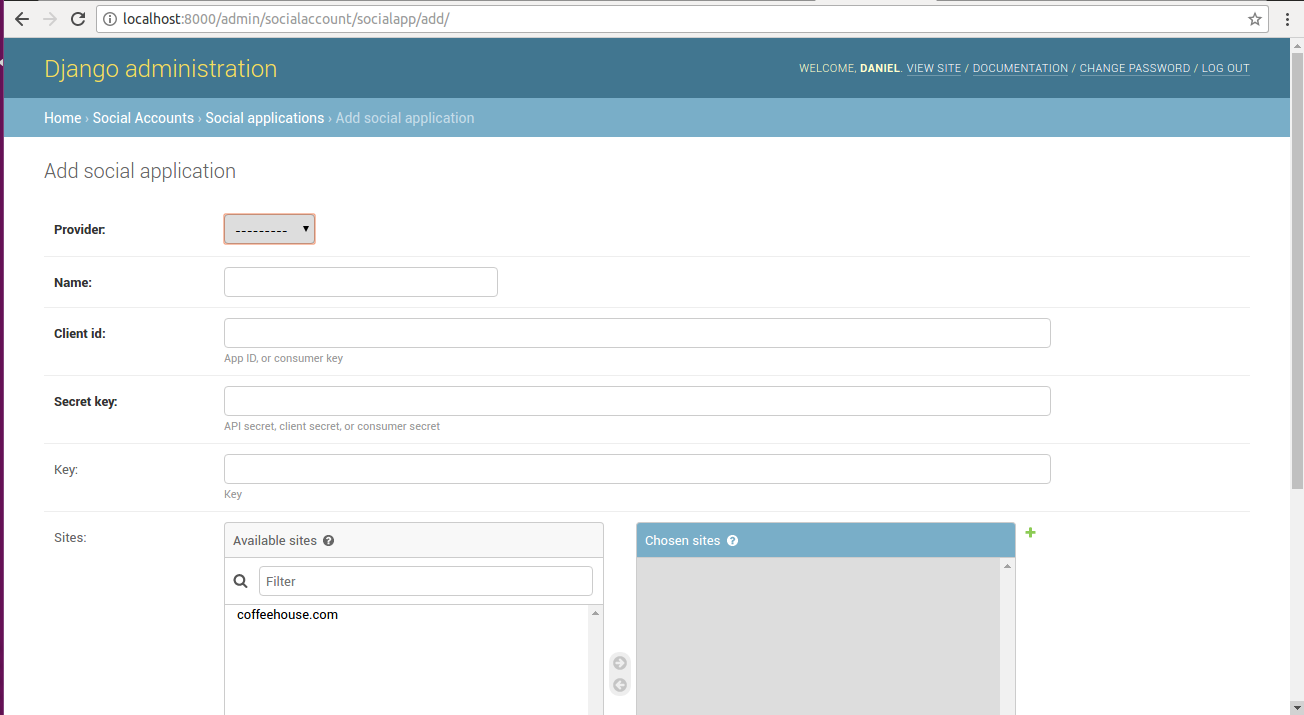
Figure 10-15. Django social application create/edit page
Setup Facebook with Django allauth
To setup Facebook social authentication in Django allauth you need a Facebook account to create an application on their site. Head over to https://developers.facebook.com/apps. If you've previously created a Facebook application you'll see a screen like the one in figure 10-16, if you've never created an application then you won't see a list of applications, but you'll still see the 'Add a New App' green button in the top-right corner like figure 10-16.
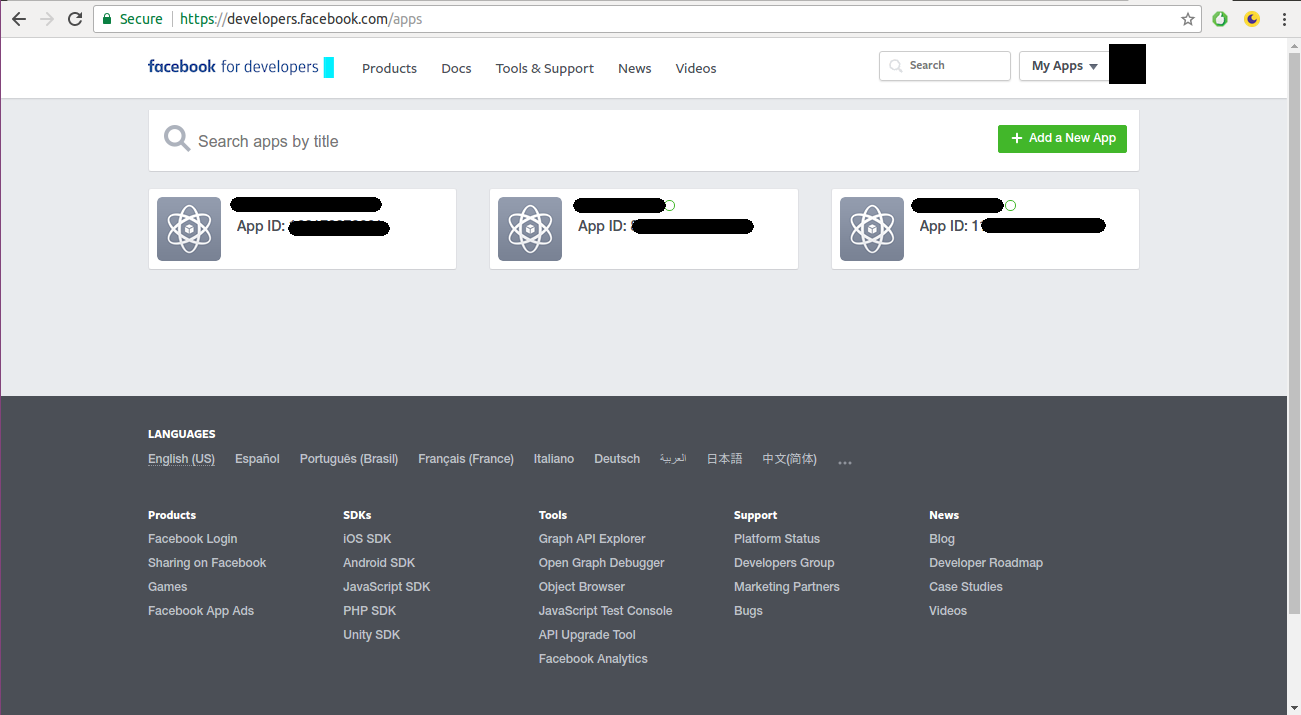
Figure 10-16 Facebook application list page
Click on the 'Add a New App' button in the top-right corner of figure 10-16 and you'll see a pop-up like the one in figure 10-17. Fill out the two options for the app name (e.g. Coffeehouse) and contact email and click on the 'Create App ID' button.
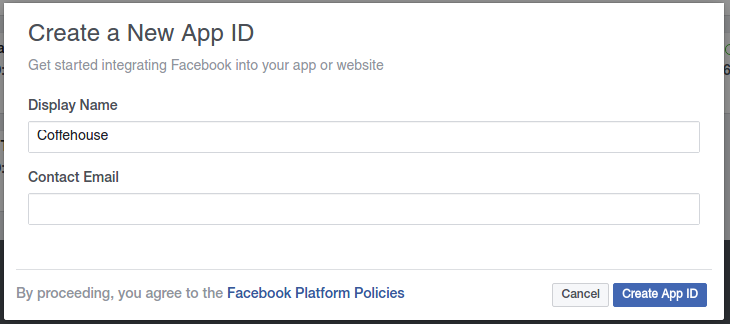
Figure 10-17.- Facebook create application pop-up
When you click on the 'Create App ID' button, the app is created and you're taken to the app's main page. Next, let's go back to the page with the list of apps -- illustrated in figure 10-16 -- by clicking on the 'See all apps' button on the left-column drop-down or by just visiting the https://developers.facebook.com/apps url again -- you can come back later to app's main page by clicking on the app on the page with the list of apps.
While on the Facebook app list page -- figure 10-16 -- hover your mouse pointer over the top right corner of the application you just created until an arrow appears, click on the arrow and from the pop-up menu click on the 'Create Test App' option as illustrated in figure 10-18.
Next, a pop-up appears where you can assign a name to the test app or leave the default name, choose accordingly. Upon termination, you'll see a screen like the one in figure 10-19 with all the app configuration parameters. If you don't see figure 10-19, go back to the Facebook app list page in figure 10-16, hover over the top right corner again and select the test application from the pop-up menu.
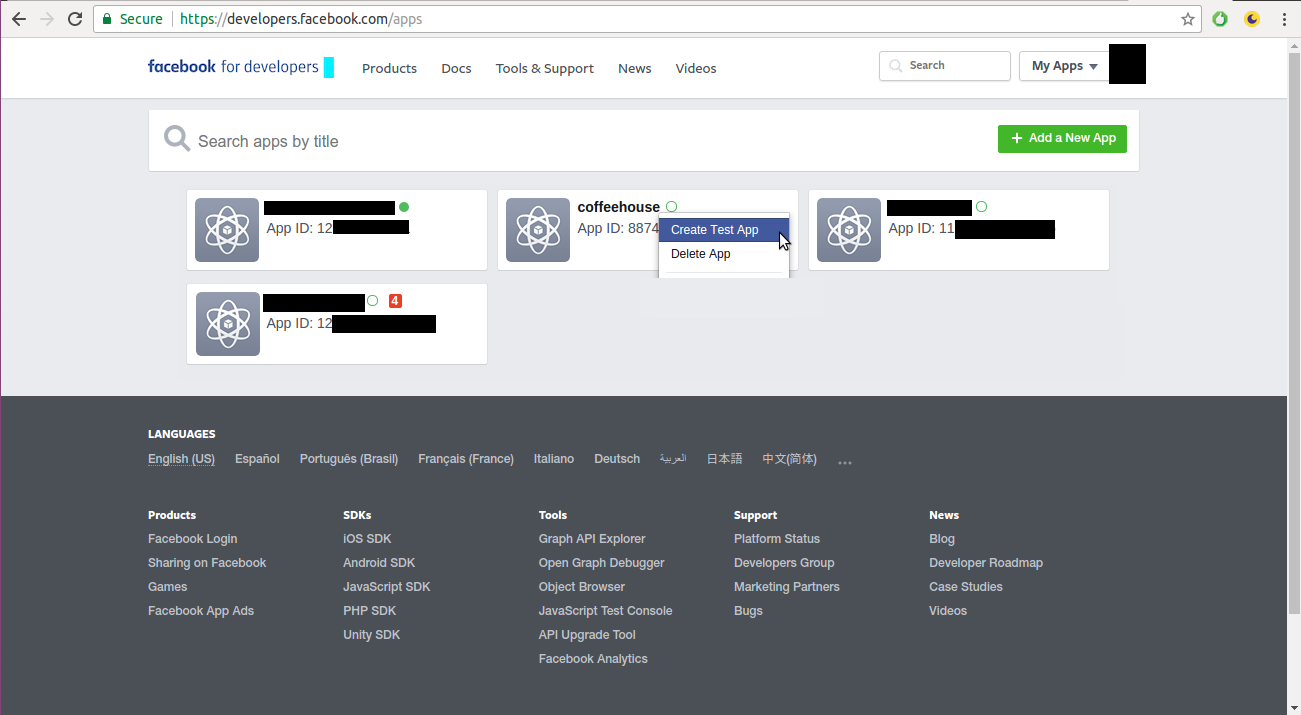
Figure 10-18.- Facebook create test application pop-up menu
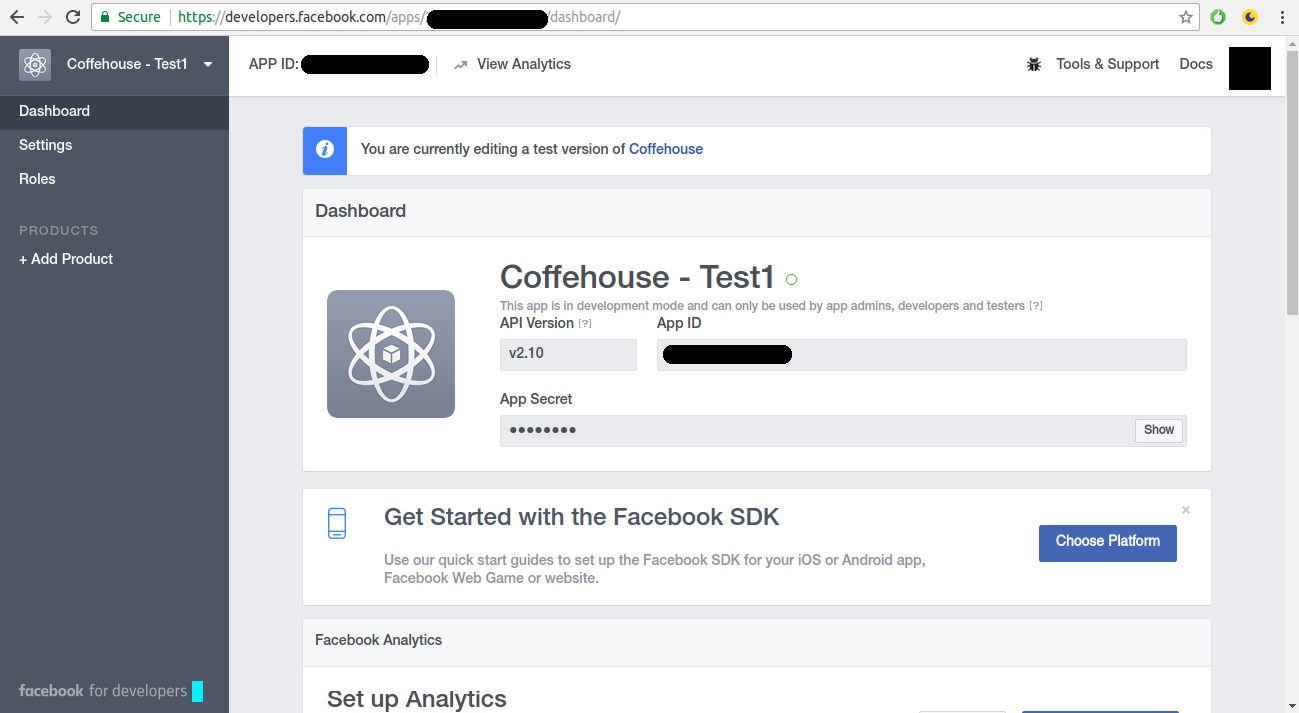
Figure 10-19.- Facebook test app main page
In figure 10-19, you can see there's an 'App ID' value, as well as a hidden 'App Secret' value you can see by clicking on the 'Show' button. In addition, on the left hand side you can see a series of tabs to further customize an application's parameters. Click on the 'Settings'/'Basic' menu in the left-hand column.
While on the 'Settings'/'Basic'
menu, in the center-bottom of page you'll see a large button '+ Add
platform', as shown in figure 10-20. Click on the '+ Add platform'
button and in the pop-up menu select the 'Website' option. This
adds a 'Website' box above the '+ Add platform' button, in this
box's input field add the url of your Django application (e.g.
http://localhost) to tell Facebook to accept login
request from this domain -- as illustrated in figure 10-20 -- and
in addition, on the 'App Domains' input field near the top of the
page also add the url of you Django application -- as it's also
illustrated in figure 10-20.
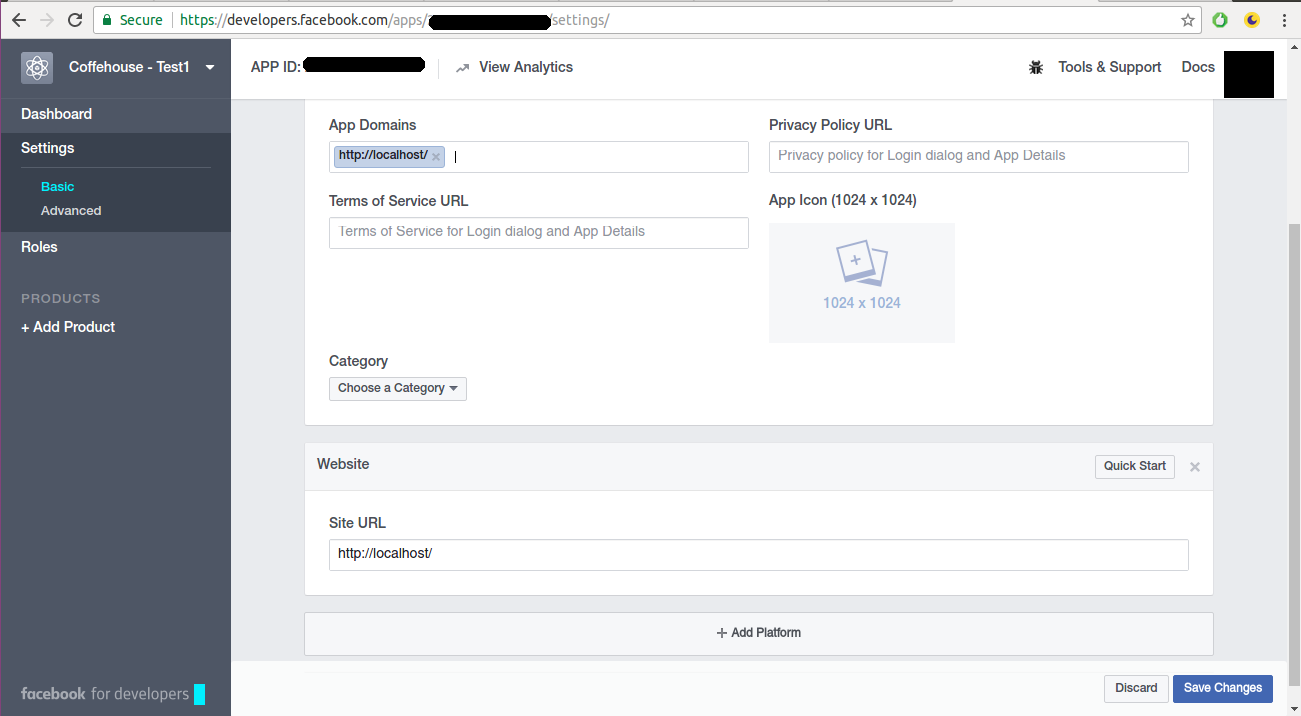
Figure 10-20.- Facebook test app configuration for authorized domain requests
Next, go to the Django admin and in the 'Social applications' model create/edit page -- illustrated in figure 10-15 -- create a Facebook application by selecting 'Facebook' from the provider list, introduce a friendly name in the 'Name' box, introduce the Facebook 'App ID' value in the 'Client Id' box and introduce the Facebook 'App Secret' value in the 'Secret key' box.
Next, open your Django project's
settings.py file and update the
SOCIALACCOUNT_PROVIDERS variable with the Facebook
configuration parameters illustrated in listing 10-21.
Listing 10-21. Facebook social provider configuration for Django allauth in settings.py
SOCIALACCOUNT_PROVIDERS =  { 'facebook':
                               {'METHOD': 'oauth2',
                                'SCOPE': ['email'],
                                'AUTH_PARAMS': {'auth_type': 'reauthenticate'},
                                'LOCALE_FUNC': lambda request: 'en_US',
                                'VERSION': 'v2.4'
                               }
                           }
The settings in listing 10-21 are
the most basic set of values to run Facebook authentication, there
are many other options you can consult in the Django allauth
documentation. Next, start your Django application and visit the
/accounts/login/ page to attempt to log-in, you will
see a page like the one illustrated in figure 10-21.
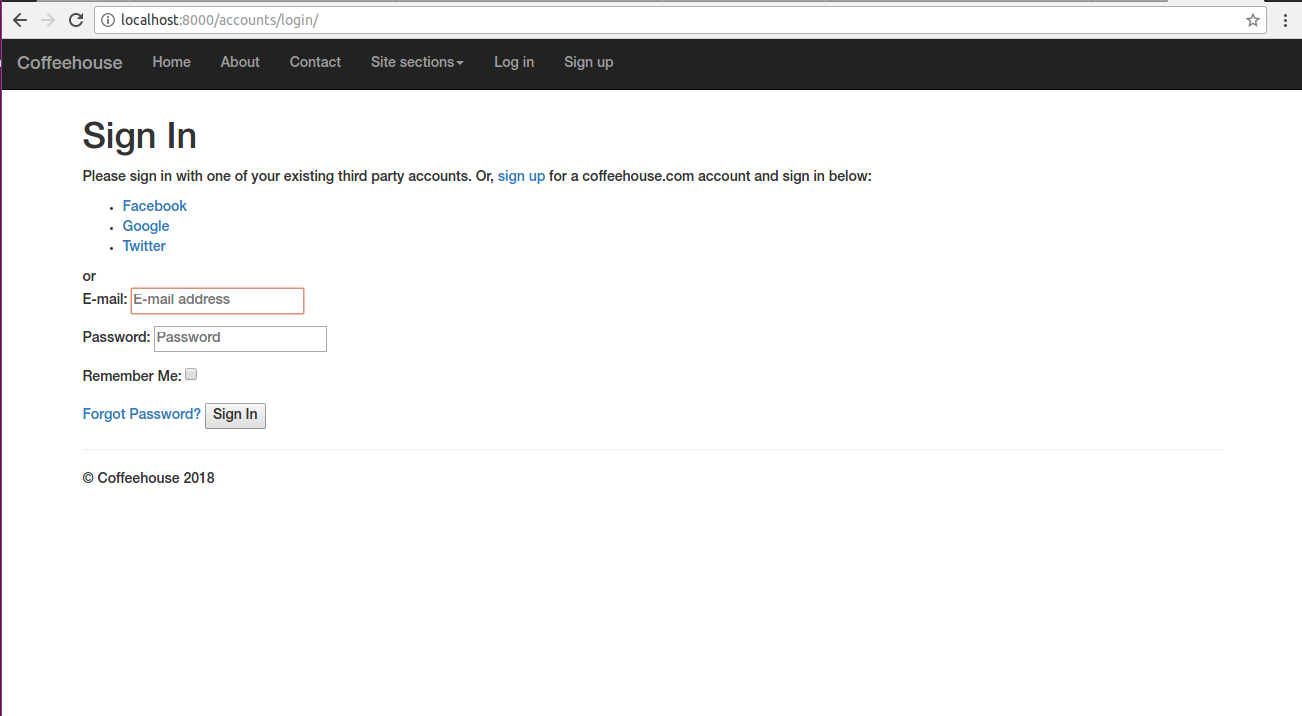
Figure 10-21.- Django log-in with social authentication options
As you can see in figure 10-21, unlike the log in page from the Django allauth based configuration, there are now options to sign-up with Facebook, Google and Twitter. Click on the Facebook link and you'll be re-directed to a Facebook page to grant authorization, as illustrated in figure 10-22.
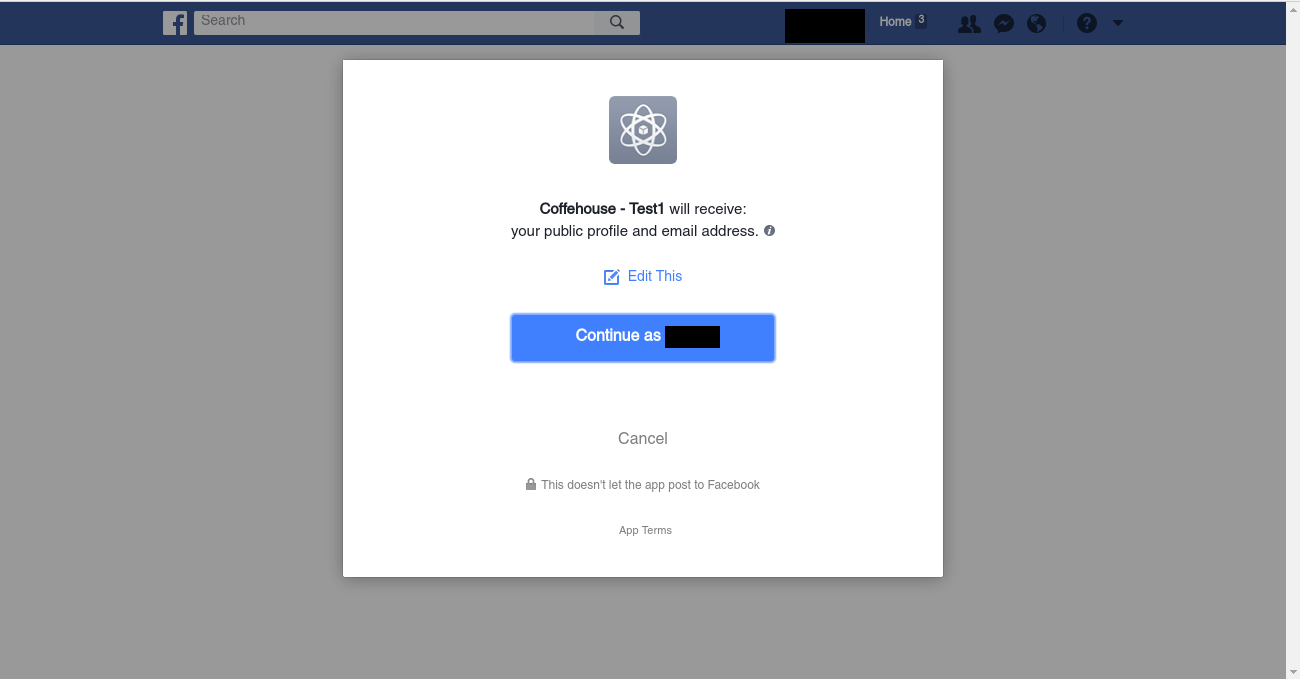
Figure 10-22. Facebook social authorization pop-up
As you can see in figure 10-22, a user is told the action will share his public profile and email upon confirmation. If the user clicks 'Continue as...' Facebook contacts the Django application with a token and the user's information (i.e. public profile info and email). At this juncture, Django allauth creates a user and puts him through the regular Django allauth user creation workflow.
Because of the previous base Django allauth configuration -- on which this social configuration is based -- that enforced email verification, a user won't be able to log in to application until he verifies his email account via Django allauth, irrespective of the Facebook authentication workflow. Once a user confirms his email through a verification link sent by Django allauth, a user is marked as verified and can proceed to log in to the application -- note this email verification process is not specific or required for social authentication and you can disable it you want to allow automatic log in immediately after Facebook returns a response.
With the Facebook authentication and email verification complete, a user can sign-in to the Django application by clicking on the 'Facebook' sign-in link at any time thereafter.
Under the hood, Django allauth keeps track of social authentication tokens and accounts in the 'Social application tokens' and 'Social accounts' models, which are both accessible in the Django admin.
In addition, Django allauth also
creates a regular Django user (e.g. the
django.contrib.auth.models.User kind) with the
Facebook workflow, so the same user is capable of leveraging
Django's standard authentication system (e.g. to become superuser
or staff). Note however that this type of user relies on a Facebook
authorization token -- and has no password -- so authentication
must always be done through the social Facebook authentication link
in /accounts/login/, with the Django admin not working
for this type of user because it requires a typed in password.
Bare in mind that in addition to the multiple Facebook specific configuration Django allauth options which are beyond the scope of this discussion, there are other social authentication concepts (e.g. token revocation, callback urls) that you'll need to explore and configure on your own -- given they are not Django specific -- to offer a streamlined social authentication process to end users.
Note The previous procedure is done as a Facebook 'Test application' -- see figure 10-18. For the live version of a Django application, you must perform this identical procedure on the primary (i.e. non-test) channel of the same Facebook application.
Setup Google with Django allauth
To setup Google social authentication in Django allauth you'll need a Google account to create an application on their site. Head over to https://console.developers.google.com/. If you've previously created Google projects you'll land on a default project. While you can create the social authentication workflow on any Google project, I recommend you create a new project for this purpose.
On the top menu bar -- to the right-hand side of the 'Google APIs' logo -- there's a menu with the default project name, click on it and a pop-up appears with a list of projects. Inside this last pop-up and besides the search box is a '+' (plus) button named 'Create project'. Click on the 'Create project' button and you'll be taken to the page illustrated in figure 10-23. Introduce a project name and click on the 'Create' button.
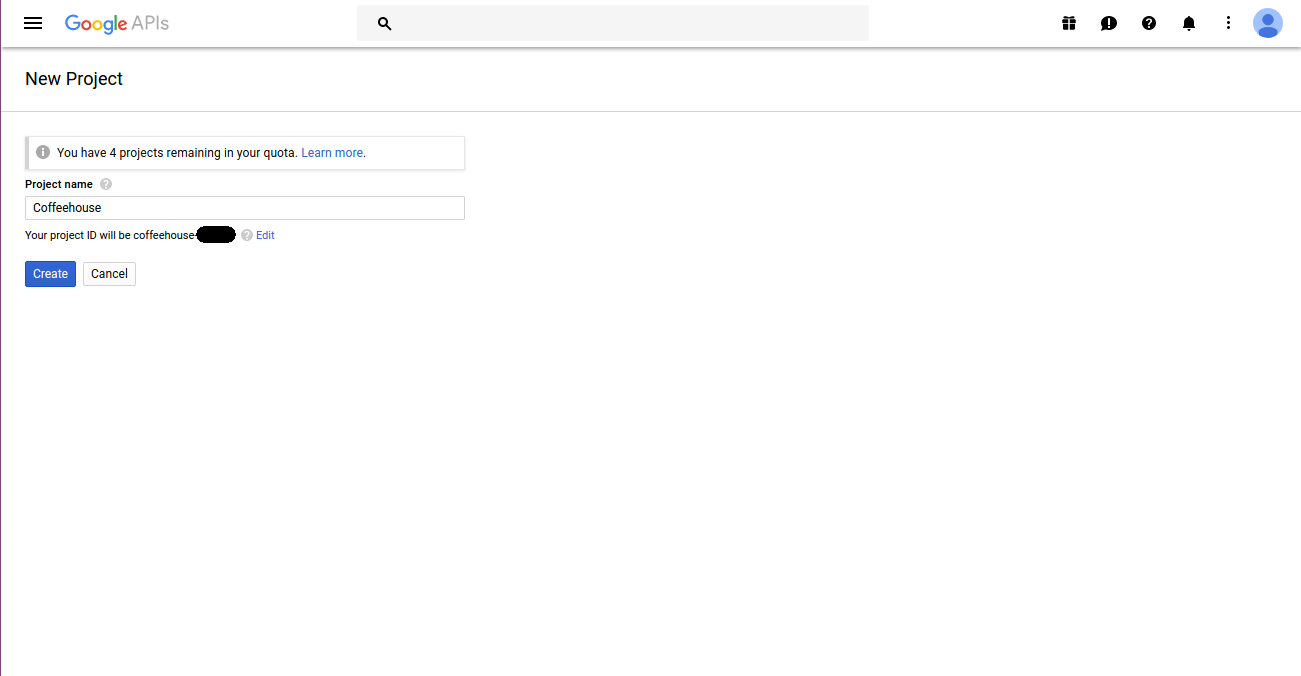
Figure 10-23. Google create project page
After you click on the 'Create button', you'll be taken to the project's home page shown in figure 10-24. Ensure you're placed in the project you just created verifying the name of the selected project in top menu bar -- to the right-hand side of the 'Google APIs' logo. If it's not the correct project, click on project and from the pop-up select the appropriate project from the list of projects
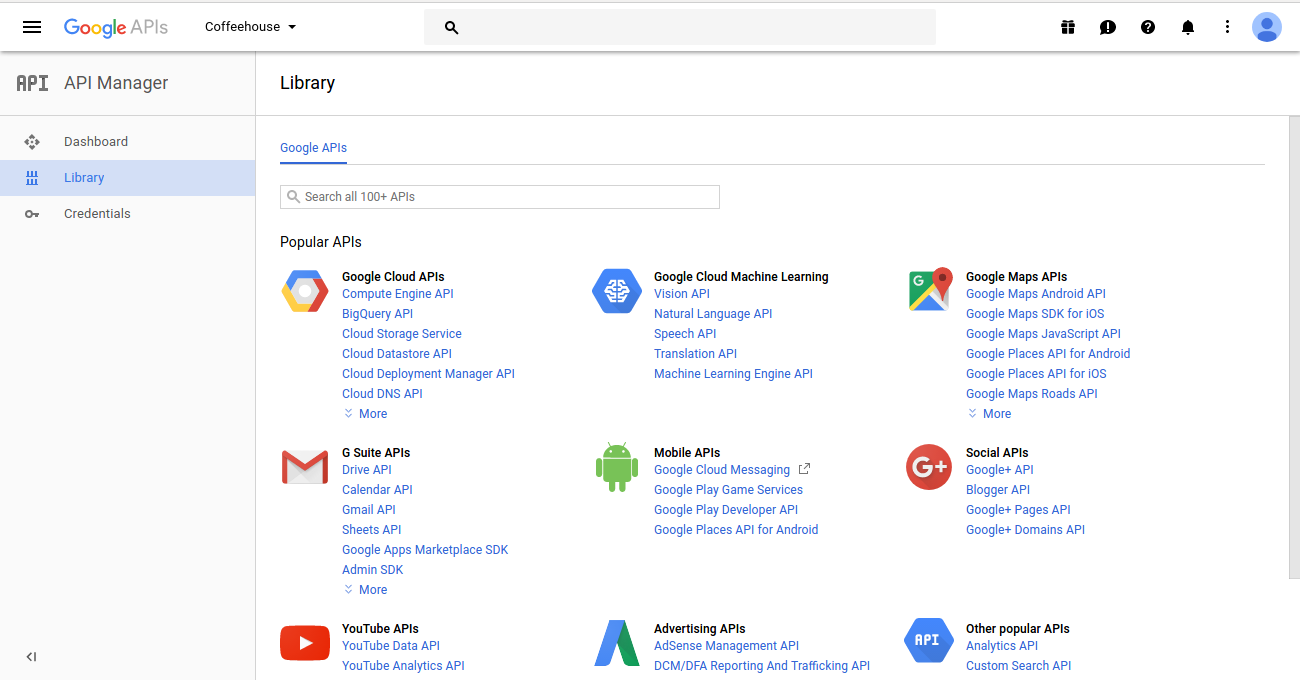
Figure 10-24. Google project main page
On the left hand side menu of figure 10-24, click on the 'Credentials' option. Next, on the center of the page click on the 'Add credentials' button and from the drop-down menu select the 'OAuth client ID' option as illustrated in figure 10-25.
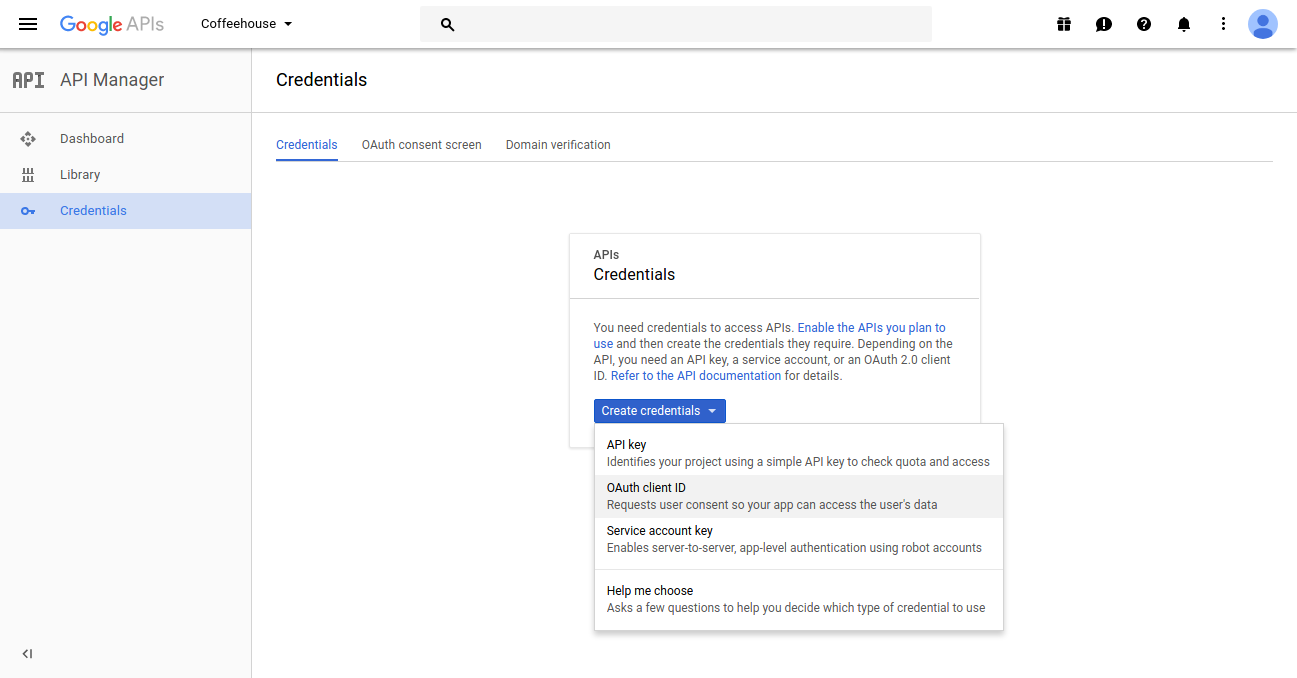
Figure 10-25. Google project Oauth client ID option
Once you click on the 'OAuth client ID' option you'll be taken to the 'Create Client ID' page illustrated in figure 10-26. You should select the 'Web application' option, however, notice the warning at the top of the page indicating 'To create an OAuth client ID, you must first set a product name on the consent screen'. So lets take care of this consent screen first, click on the 'Configure consent screen' button from figure 10-26 to take you to the page in figure 10-27.
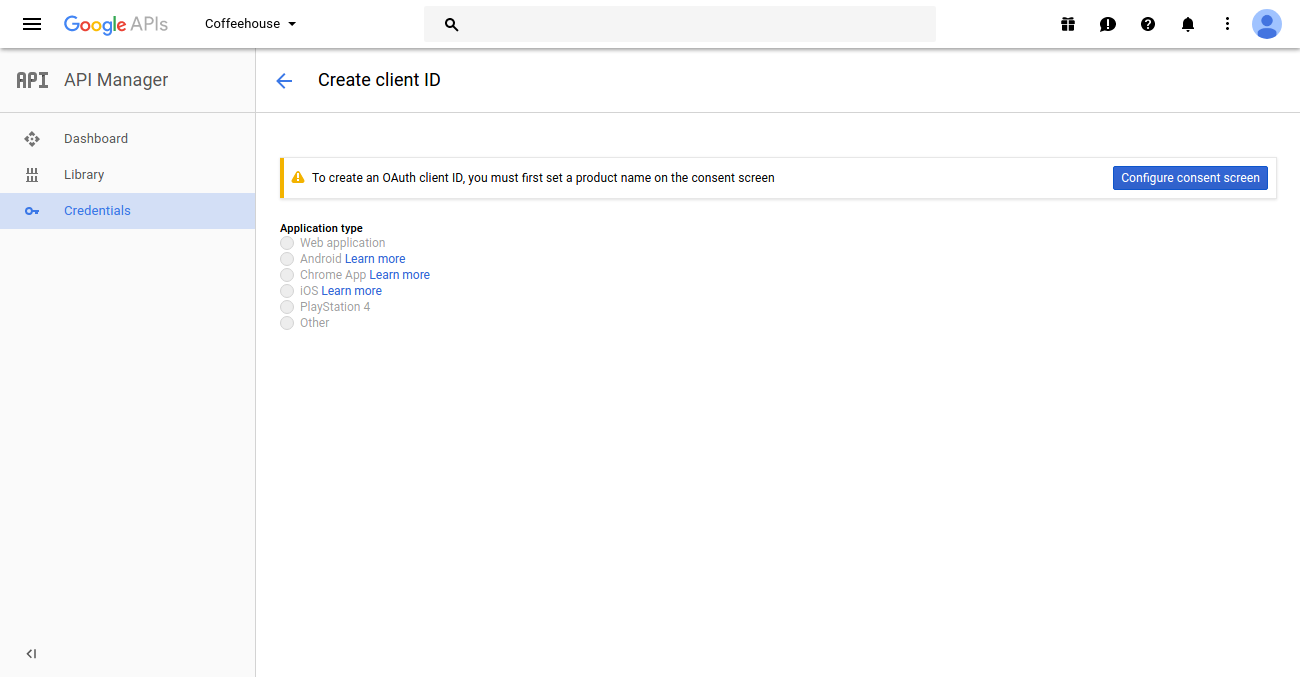
Figure 10-26. Google project create client ID page
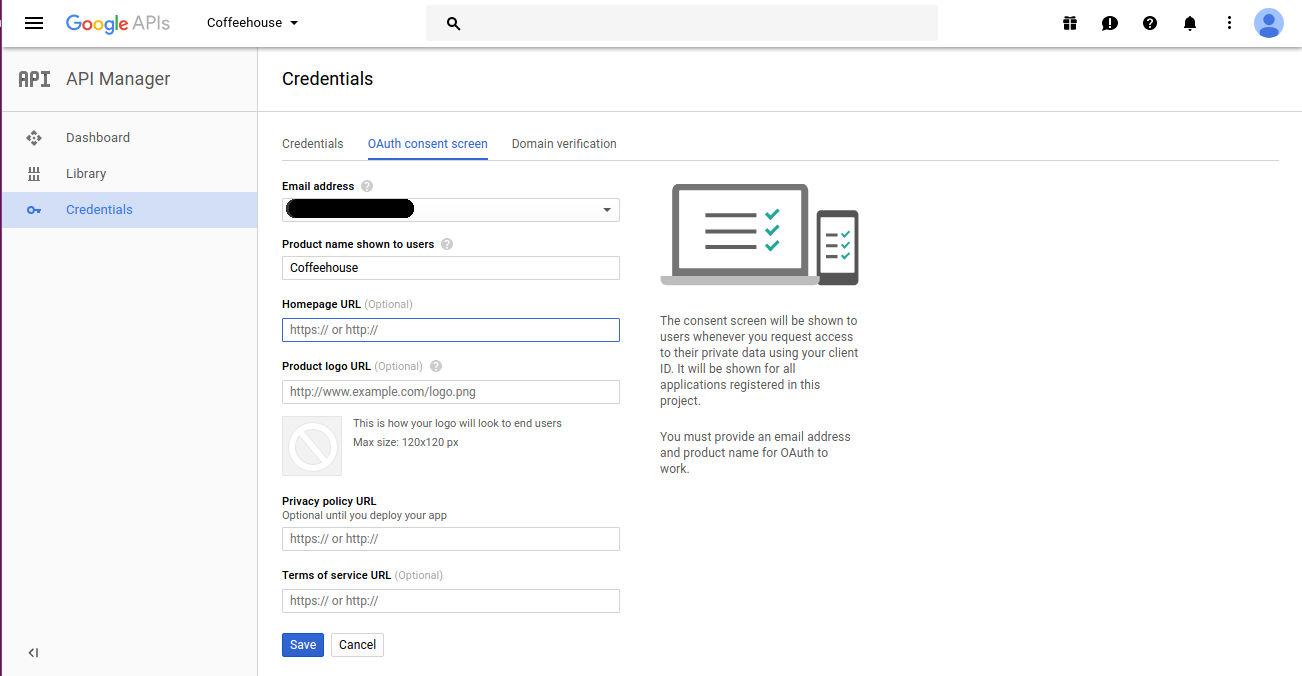
Figure 10-27. Google project OAuth consent screen
The consent screen in figure 10-27 is used to customize how an end user is greeted by Google when seeking authorization from an app, in our case the Django application. Fill in the required 'Product name shown to users' field and save the changes. Once the consent screen is saved, you'll be taken back to the screen in figure 10-26 where you can select the 'Web Application' option.
In the 'Web application' page,
the 'Name' field is given the default 'Web client 1' value which
you can adjust accordingly. Set the 'Authorized JavaScript origins'
option to the Django application's domain (e.g.
http://localhost) and also set the 'Authorized
redirect URIs' option to the Django allauth url
/accounts/google/login/callback/ which is where Google
will contact the application after successful authentication --
note this last value must use a full-qualified domain (e.g.
http://localhost/accounts/google/login/callback/).
Once you input the necessary values in the 'Web application' page, click on the 'Create' button and you'll see a pop-up like the one in figure 10-28 with the application Client ID and Client Secret -- if you close the pop-up you can later access the same values in the main 'Credentials' menu on the left hand side.
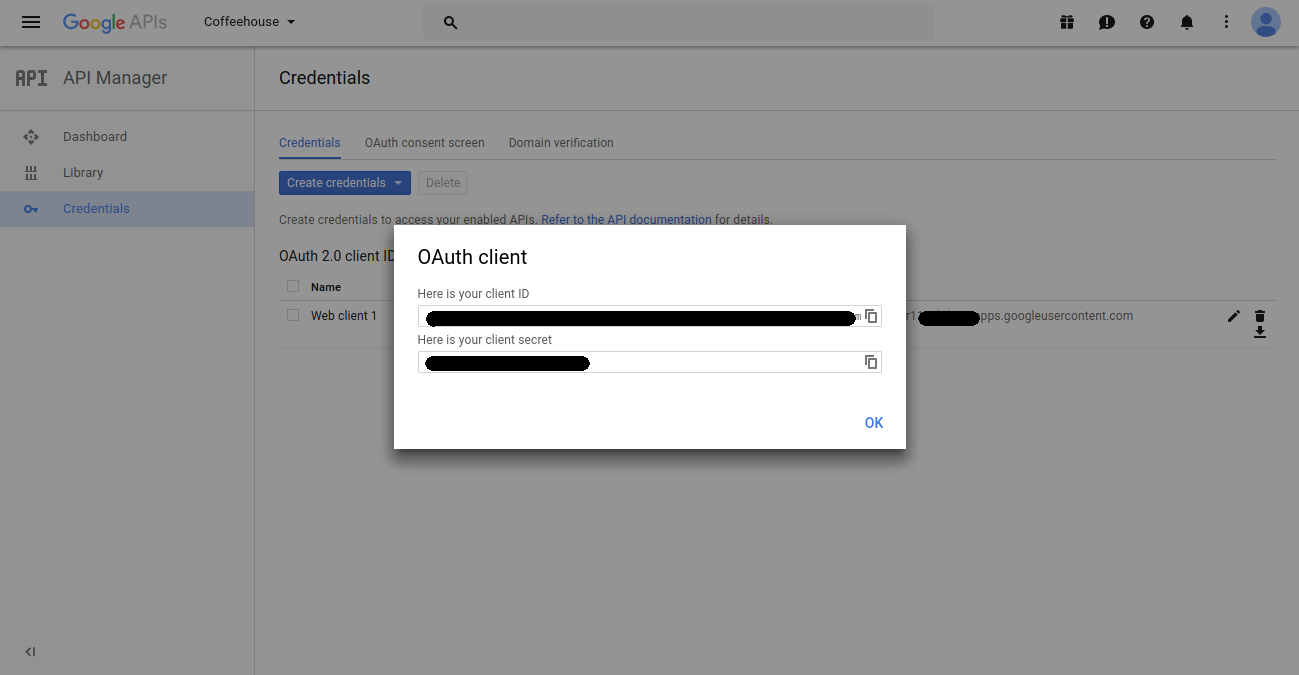
Figure 10-28. Google project Client ID and Client Secret
Next, go to the Django admin and in the 'Social applications' model create/edit page -- illustrated in figure 10-15 -- create a Google application by selecting 'Google' from the provider list, introduce a friendly name in the 'Name' box, introduce the Google 'Client ID' value in the 'Client Id' box and introduce the Google 'Client Secret' value in the 'Secret key' box
Next, open your Django project's
settings.py file and update the
SOCIALACCOUNT_PROVIDERS variable with the Google
configuration parameters illustrated in listing 10-22.
Listing 10-22 Google social provider configuration for django-allauth in settings.py
SOCIALACCOUNT_PROVIDERS = { 'google':
                             { 'SCOPE': ['email'],
                               'AUTH_PARAMS': { 'access_type': 'online' }
                             }
                          }
The settings in listing 10-22 are
the most basic set of values to run Google authentication, there
are many other options you can consult in the Django allauth
documentation. Next, start the Django application and visit the
/accounts/login/ page -- in figure 10-21 -- to attempt
a Google log in. Click on the 'Google' sign up link and you'll be
re-directed to a Google grant authorization page, illustrated in
the figure 10-29.
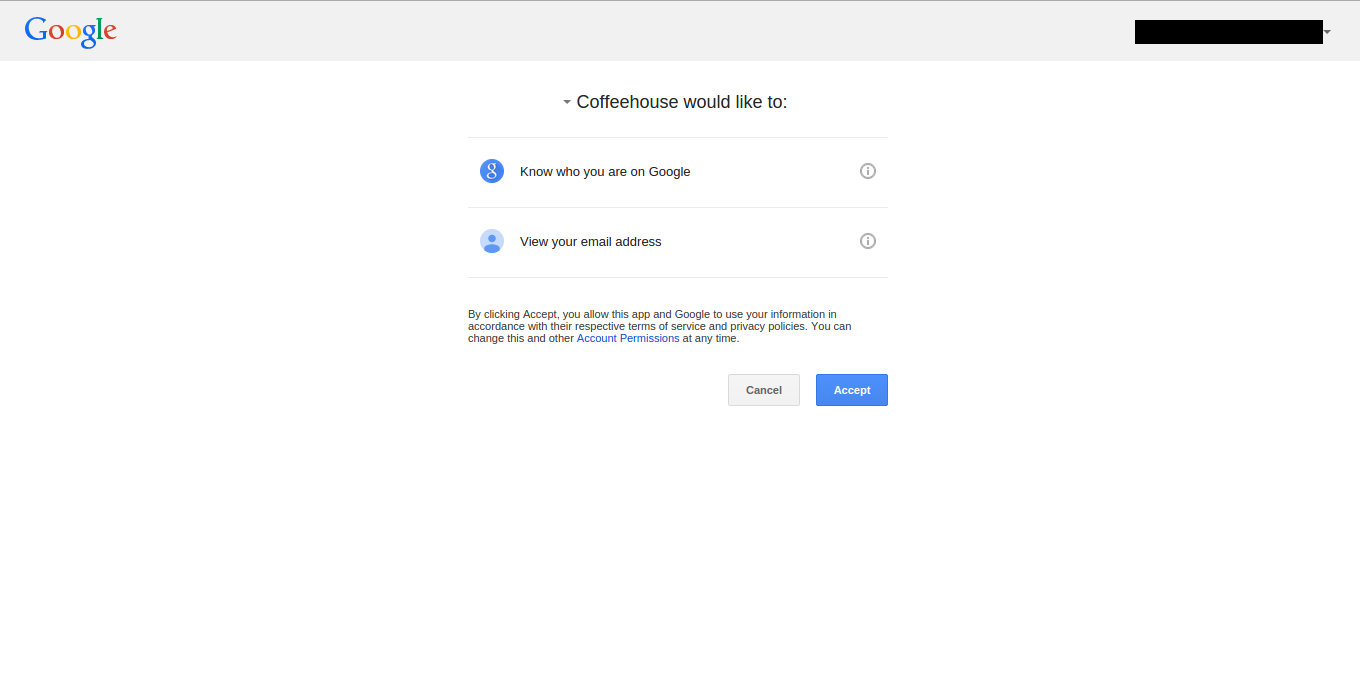
Figure 10-29. Google social authorization page
As you can see in Figure 10-29, a user is informed he will share who he is and his email upon confirmation. If the user clicks 'Accept', Google contacts the Django application with a token and the user's information (i.e. public profile info and email). At this juncture, Django allauth creates a user so he's able to sign into the Django application by simply clicking on the 'Google' sign-in link every time.
Because Google itself requires valid emails to work, it's implied a user authenticating via Google uses an active and valid email, therefore Django allauth skips the email verification process and automatically marks a user as verified -- unlike Facebook authentication, where users can keep using Facebook with a stale and potentially invalid email.
Under the hood, Django allauth keeps track of social authentication tokens and accounts in the 'Social application tokens' and 'Social accounts' models, which are both accessible in the Django admin.
In addition, Django allauth also
creates a regular Django user (e.g. the
django.contrib.auth.models.User kind) with the Google
workflow, so the same user is capable of leveraging Django's
standard authentication system (e.g. to become superuser or staff).
Note however this type of user relies on a Google authorization
token -- and has no password -- so authentication must always be
done through the social Google authentication link in
/accounts/login/, with the Django admin not working
for this type of user because it requires a typed in password.
Setup Twitter with Django allauth
To setup Twitter social authentication in Django allauth you'll need a Twitter account to create an application on their site. Head over to https://apps.twitter.com/app/new and you'll see a screen like the one in figure 10-30 to create a Twitter app.
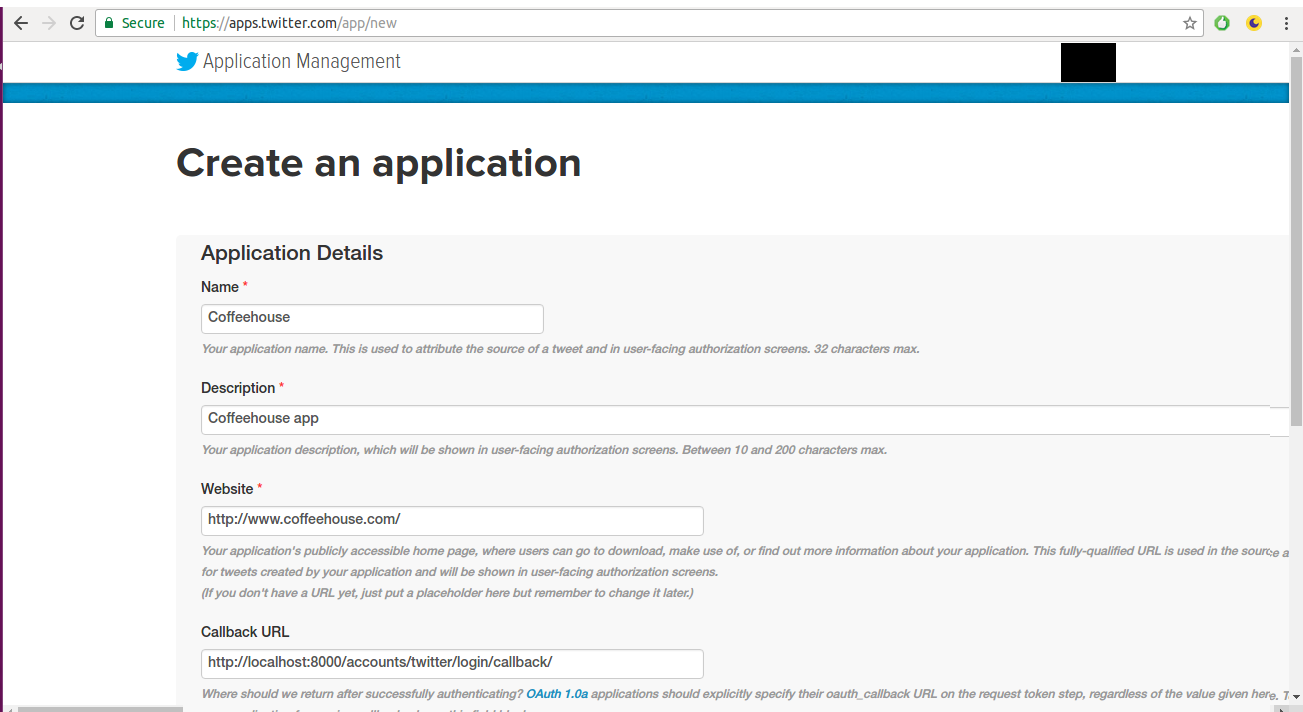
Figure 10-30. Twitter create app page
Fill out the required details for
the new Twitter app, ensuring the 'Callback URL' field is set to
http://localhost:8000/accounts/twitter/login/callback/
which is where Twitter will contact the Django application upon
successful authentication. Create the application and you'll be
re-directed to the Twitter application's main page. Next, click on
the 'Keys and Access Tokens' tab, whee you'll see screen like the
one in figure 10-31.
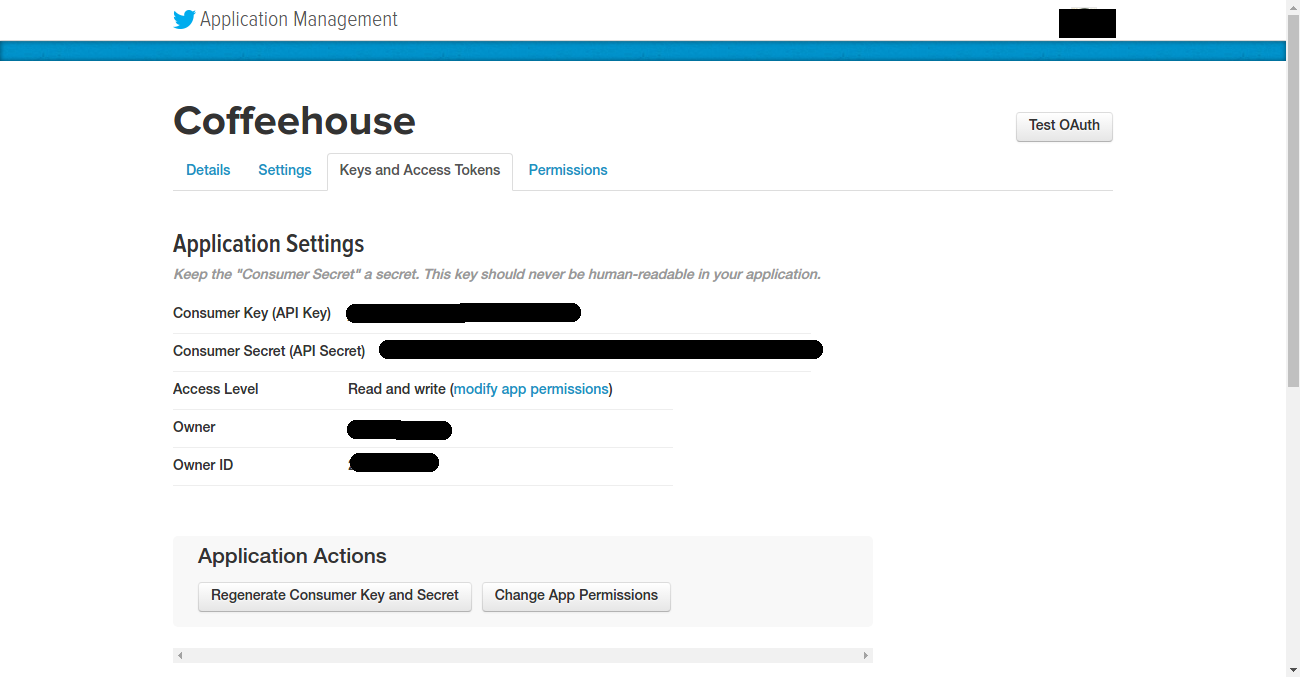
Figure 10-31.- Twitter app Key and Access Tokens page
Next, go to the Django admin and in the 'Social applications' model create/edit page -- illustrated in figure 10-15 -- create a Twitter application by selecting 'Twitter' from the provider list, introduce a friendly name in the 'Name' box, introduce the Twitter 'Consumer Key (API Key)' value in the 'Client Id' box and introduce the Twitter 'Consumer Secret' value in the 'Secret key' box.
Django allauth doesn't support
any Twitter configuration options as part of the
SOCIALACCOUNT_PROVIDERS variable in settings.py, so
you can skip this configuration step.
Next, start your Django
application and visit the /accounts/login/ page -- in
figure 10-21 -- to attempt to Twitter log in. Click on the
'Twitter' sign in link and you'll be re-directed to a Twitter grant
authorization page, illustrated in the figure 10-32.
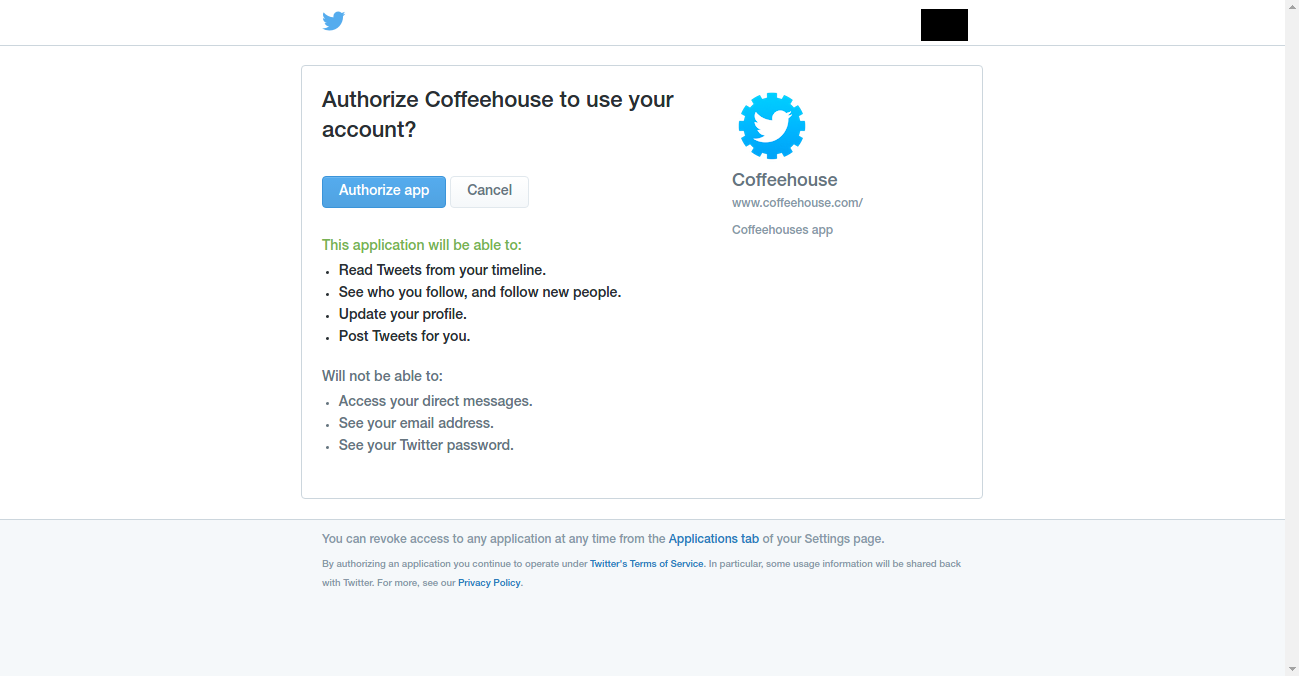
Figure 10-32. Twitter social authorization page
As you can see in figure 10-32, a user is told he will share tweets and other information upon confirmation. If the user clicks 'Authorize ap', Twitter contacts the Django application with a token and the user's information (i.e. public profile info). At this juncture, the user is re-directed back to the site and Django allauth asks a user for his email to finish the account creation process, as illustrated in figure 10-33.
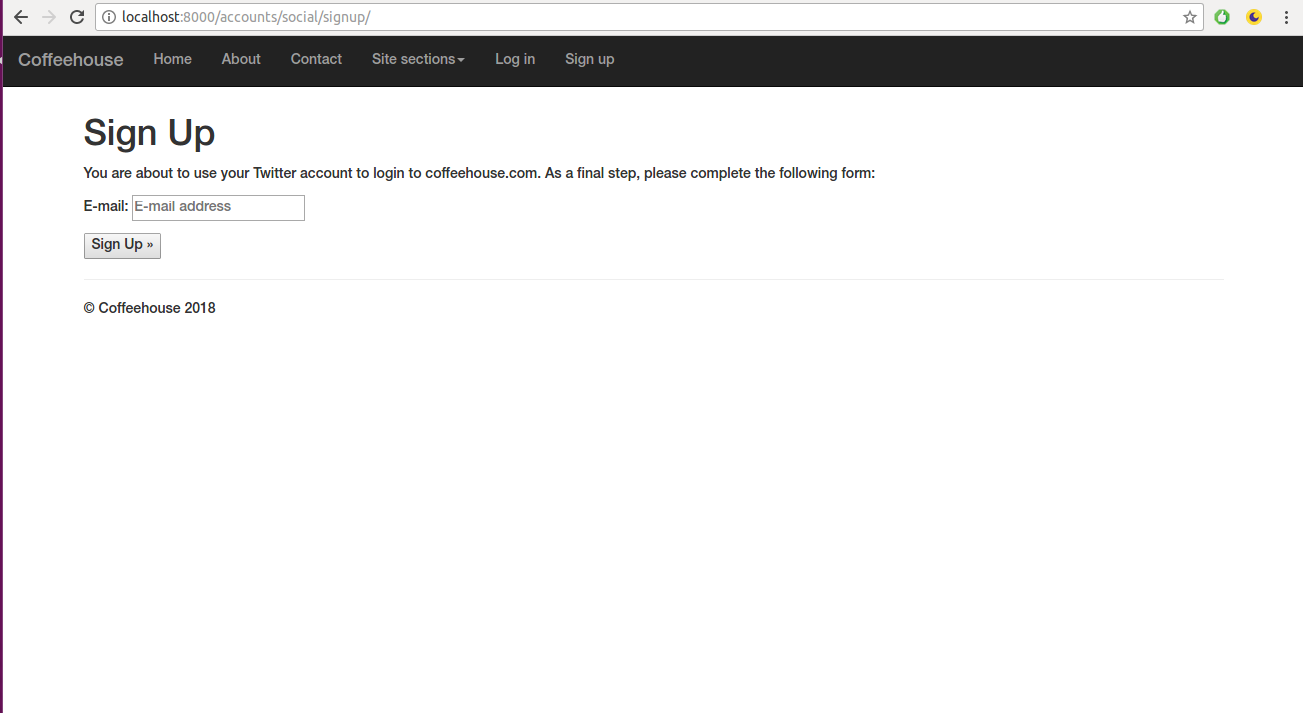
Figure 10-33. Django allauth email request after Twitter social authorization
Note this last email request in figure 10-33 is necessary because Twitter does not provide an email with their social authentication -- difficult as it may be to believe, it's a known Twitter social authentication limitation.
Because the base Django allauth configuration enforces email verification -- to avoid garbage emails -- a user is sent a verification email in which he has to click on a link to finish activation.
Once a user confirms his email by clicking on the verification email link, he can sign in to the Django application by clicking on the 'Twitter' sign in link at any time. Under the hood, Django allauth keeps track of social authentication tokens and accounts in the 'Social application tokens' and 'Social accounts' models, which are both accessible in the Django admin.
In addition, Django allauth also
creates a regular user (e.g. the
django.contrib.auth.models.User kind) with the Twitter
workflow, so the same user is capable of leveraging Django's
standard authentication system (e.g. to become superuser or staff).
Note however that this type of user relies on a Twitter
authorization token -- and has no password -- so authentication
must always be done through the social Twitter authentication link
in /accounts/login/, with the Django admin not working
for this type of user because it requires a typed in password.